7 Tips for Choosing the Right Armored Patch Cable

Time:2026-09-20 Author:Sophia
0%

Choosing the right Armored Patch Cable is no longer a minor purchasing decision. It can affect uptime, maintenance costs, installation safety, and network performance.

Cisco’s Annual Internet Report projected 29.3 billion networked devices by 2023. That growth increases pressure on dense data centers and industrial communication systems. Uptime Institute’s 2024 Global Data Center Survey also showed that outages remain a serious operational concern. Cable selection cannot prevent every failure. It can reduce avoidable risks.

Jim Hayes, founder of the Fiber Optic Association, has repeatedly emphasized a practical principle: “The quality of the installation determines the quality of the network.” This reminder matters when cables pass through crowded racks, factory floors, or exposed pathways. A tough jacket alone does not guarantee dependable service.

A suitable Armored Patch Cable should match the environment, connector type, bend radius, fiber or copper specification, and required transmission speed. Metal armor may resist crushing and rodent damage, but it can increase weight and reduce flexibility. That trade-off is easy to overlook.

Real installations often reveal the weak points. A cable may fit the port but fail during repeated movement. Labels may fade under heat. Connectors may collect dust near unfinished construction areas. These details deserve attention.

The following seven tips examine practical selection criteria, including protection level, compatibility, routing space, testing evidence, and supplier reliability. Some recommendations may seem obvious. They are still frequently missed. The right choice is not always the strongest cable. It is the cable that fits the actual risk.
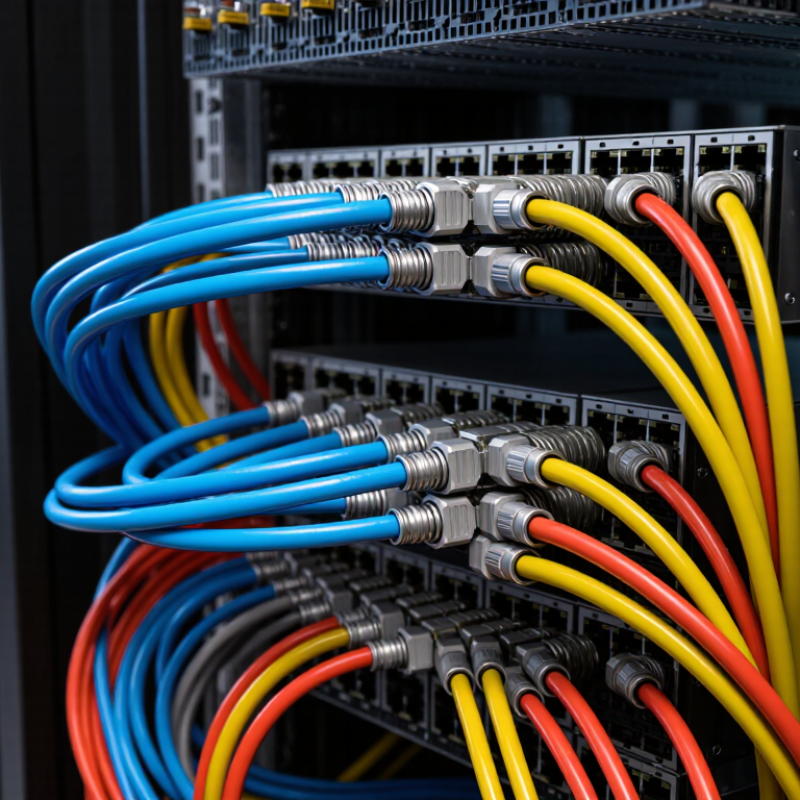
7 Tips for Choosing the Right Armored Patch Cable

Understand the Structure and Purpose of Armored Patch Cables

Armored patch cables combine several layers, each with a specific job. The conductor carries electrical or optical signals. Insulation separates the conductors and controls signal stability. Around them, shielding may reduce electromagnetic interference. The armor adds mechanical protection, often through braided metal or a flexible protective layer. An outer jacket seals the assembly against abrasion, moisture, and dust. Connectors complete the pathway, but they remain vulnerable points.

The structure explains the cable’s purpose. Armor helps resist crushing under equipment, repeated movement, and accidental contact with sharp edges. It can also discourage damage from rodents in exposed areas. Shielding and armor are not identical. Shielding manages interference, while armor mainly protects against physical stress. Some designs combine both. Check the datasheet carefully, especially for bend radius, temperature range, ingress protection, and grounding requirements.

I have seen installers focus on the metal layer and ignore the connector transition. That mistake can create the weakest point. A cable may survive a heavy cabinet, yet fail after a tight bend near the plug. Leave service loops where space allows. Use approved clamps instead of crushing the jacket with ordinary ties. Armor is not magic. Poor routing still causes failures. I would also verify compatibility with the port, transmission category, and installation environment before ordering. A slightly more flexible cable may perform better than a heavily armored one in a crowded rack.

Match Cable Specifications to Your Network Requirements

A reliable armored patch cable begins with the network, not the jacket. The Annual Internet Report projected global IP traffic at 5,060 exabytes monthly in 2023. That growth makes speed and bandwidth practical decisions. Match Category 6A or higher with planned 10GbE links. Check switch ports, transceivers, and channel length too. A higher category cannot repair a weak system.

Confirm conductor type, impedance, and length before ordering. Solid copper suits fixed connections. Stranded copper bends better inside crowded cabinets. Avoid copper-clad aluminum when standards-compliant performance matters. TIA-568.2-D and ISO/IEC 11801 define balanced cabling requirements. However, installation quality still controls results. A short cable can fail when tight bends distort its geometry.

Armoring must fit the environment. Select metal armor for abrasion or rodent protection. Use lighter construction in dense cabinets. Check bend radius, jacket rating, connector shielding, and temperature limits. Shielded cable also needs proper bonding. Otherwise, shielding can add complexity instead of protection. The 2023 Global Data Center Survey reported that approximately 60% of operators experienced an outage within three years. Testing matters. Verify insertion loss, wire mapping, and near-end crosstalk where possible. I once treated “Category 6A” as sufficient evidence. It was not. Record port speed, cable length, test results, and replacement dates. Small records reveal large assumptions.

7 Tips for Choosing the Right Armored Patch Cable - Match Cable Specifications to Your Network Requirements

Tip Network Requirement Recommended Cable Specification Why It Matters Key Checks Before Purchase
1 Match the cable category to the required data rate. Cat5e: up to 1 Gb/s for standard Gigabit Ethernet installations.
Cat6: up to 1 Gb/s at 100 m and suitable for some 10 Gb/s links over shorter distances.
Cat6A: up to 10 Gb/s at 100 m when the complete channel meets the applicable requirements.
Using a cable category below the network requirement can limit link speed and reduce upgrade capacity. Confirm the cable category is printed on the jacket and verify that patch panels, jacks, and transceivers support the same target performance.
2 Choose the correct shielding and armor construction. Select an armored cable with a protective metal layer for mechanical protection. For electrically noisy areas, consider a shielded construction such as F/UTP, S/FTP, or equivalent, provided the entire link is correctly bonded. Metal armor helps resist crushing, cuts, and rodent damage, while cable shielding can reduce electromagnetic interference. Armor and shielding perform different functions. Check whether the installation requires physical armor, EMI shielding, or both. Confirm compatible shielded connectors and a suitable grounding or bonding plan.
3 Verify length, insertion loss, and bend limitations. Keep the permanent copper channel within the commonly specified 100 m maximum channel length, including patch cords and horizontal cabling. Follow the manufacturer’s minimum bend radius, especially near connectors. Excessive length, tight bends, or repeated flexing can increase insertion loss, return loss, and crosstalk, causing unstable or downgraded links. Measure the complete cable route, reserve enough length for service loops, and avoid sharp bends or pulling the cable beyond its stated tension limit.
4 Confirm Power over Ethernet compatibility. For powered devices, use a cable and connector system rated for the intended PoE application, such as IEEE 802.3af, 802.3at, or 802.3bt, as applicable. Prefer conductors of sufficient size for the planned current and bundle conditions. PoE current creates heat in cable bundles. Cable size, bundle density, ambient temperature, and installation method affect temperature rise and power delivery. Verify conductor gauge, temperature rating, maximum bundle guidance, connector compatibility, and the power class required by the access point, camera, phone, or other endpoint.
5 Select the correct jacket and fire-safety rating. Use a jacket rating appropriate to the location, such as CM for general-purpose spaces, CMR for many vertical-riser applications, or CMP for air-handling plenum spaces where required by local code. The jacket material affects smoke and flame performance. A cable that is suitable for one building area may not be permitted in another. Check local electrical and fire codes, the pathway type, temperature range, oil or chemical exposure, UV exposure, and the cable’s documented listing.
6 Match the connector and termination design to the installation. Choose compatible connector types, latch protection, strain relief, and armor termination hardware. Use field-terminable designs only when the installation requires custom lengths and the termination process is controlled. Connector geometry and termination quality directly influence contact reliability, crosstalk, return loss, and service life. Confirm plug-to-port compatibility, shield continuity where required, boot clearance, latch accessibility, and whether the completed link will be tested after installation.
7 Account for the physical environment and future maintenance. For exposed or industrial routes, specify suitable resistance to impact, abrasion, moisture, vibration, temperature changes, and rodents. For frequent moves, use a flexible armored patch design rather than a stiff fixed-installation cable. The right environmental construction reduces cable failures and makes troubleshooting, replacement, and future network expansion easier. Review the operating temperature, indoor or outdoor rating, IP or ingress requirements where applicable, armor flexibility, bend-cycle expectations, labeling, and warranty documentation.

Evaluate Armor Types and Protection Levels

7 Tips for Choosing the Right Armored Patch Cable

Evaluate Armor Types and Protection Levels

Armor is not one universal shield. Choose it by the hazard around the cable, not by appearance. Flexible braided armor suits moving patch areas and moderate abrasion. Interlocked or corrugated metal armor offers stronger crush and impact resistance. However, it usually bends less easily. Foil shields reduce electromagnetic interference, but they are not mechanical armor. That distinction matters.

Check documented test data for crush force, impact resistance, tensile strength, and minimum bend radius. A higher protection level is not automatically better. Excessive armor can increase weight, stiffness, and termination difficulty. Confirm that the cable still fits the patch panel, conduit, and cable tray. Small details often cause installation problems. Ask for results from recognized testing methods, not vague claims such as “industrial grade.”

I once selected heavy armor for a crowded rack and underestimated the bend space. The cable worked, but connector stress became obvious during maintenance. That experience changed my approach. I now match protection to the actual environment, including foot traffic, sharp edges, vibration, moisture, and nearby power equipment. Check grounding requirements when conductive armor is used. Also inspect the connector transition, because unprotected ends can become the weakest point. There is no perfect choice. Recheck the assumptions.

Check Connector Compatibility and Installation Conditions

7 Tips for Choosing the Right Armored Patch Cable

Check connector compatibility before ordering. Match the connector type, polish, gender, keying, fiber mode, and core count. LC, SC, and MPO connectors are not interchangeable without suitable adapters. UPC and APC ends also require careful matching. Their end faces use different angles. A forced connection can increase insertion loss or damage the interface. ANSI/TIA-568.3-E and IEC 61754 provide useful connector and cabling references. Still, the equipment manual should remain the final authority.

Installation conditions matter just as much. Measure the cable route, then verify the minimum bend radius, pull strength, temperature range, and available rack space. Metallic armor may need bonding or grounding, depending on the cable construction and local electrical requirements. Keep the cable away from sharp tray edges. Do not compress it under a patch-panel cover. Small details matter.

Network density keeps rising. An industry internet forecast published in 2020 projected 29.3 billion connected devices and connections by 2023. More connections mean less room for installation mistakes. The Uptime Institute’s 2023 Global Data Center Survey reported that 66% of respondents experienced an outage during the previous three years. Not every outage begins with cabling, but poor connector fit can create intermittent faults that are difficult to trace. I would recheck the specification twice. A perfect checklist can still miss a cramped bend behind the rack.

Compare Quality, Standards, Cost, and Long-Term Reliability

7 Tips for Choosing the Right Armored Patch Cable

Compare Quality, Standards, Cost, and Long-Term Reliability

Choosing an armored patch cable starts with the installation environment. Measure rack distance, bend space, temperature, and movement. A cable that feels strong may still fail in a tight cabinet. Check the conductor, shielding, jacket, connector finish, and strain relief. Inspect the bend radius carefully. Small details matter.

Match the cable with recognized standards, not vague marketing claims. For structured copper networks, review ANSI/TIA-568.2-D or ISO/IEC 11801 requirements. Check transmission category, impedance, flame rating, and shielding design. In harsh areas, confirm the relevant IEC fire or environmental test reports. Ask for traceable test data, batch information, and clear compliance documents. Certifications should support the application, not decorate a datasheet.

Price comparisons should include installation time, replacement risk, and downtime. The cheapest cable can become expensive after repeated connector failures. Still, higher cost does not guarantee better performance. I once selected a heavily protected cable that exceeded the site’s needs and complicated every bend. That was poor judgment. Compare warranty terms, repair access, expected service life, and supplier support. Test a sample under real conditions, including vibration and repeated patching. Leave room for uncertainty. Field conditions often differ from the drawing. Track performance after installation, because long-term reliability is measured in service, not only on a test bench.

FAQS

What layers make up an armored patch cable?

A conductor carries electrical or optical signals. Insulation separates conductors and supports signal stability. Shielding may reduce interference. Armor resists physical damage. The outer jacket helps block moisture, dust, and abrasion. Connectors complete the pathway. Connectors still fail.

What does armor protect against?

Armor helps resist crushing, repeated movement, sharp edges, and accidental contact. It may also discourage rodent damage in exposed areas. Armor is not magic. Poor routing can still cause failure.

Is shielding the same as armor?

No. Shielding mainly manages electromagnetic interference. Armor mainly protects against physical stress. Some cables combine both functions. Check the design carefully.

Why is the connector transition important?

The connector area can become the weakest point. A cable may survive cabinet pressure but fail after a tight bend near the plug. Leave a service loop when space allows. Use approved clamps. Ordinary ties may crush the jacket.

What should I check before ordering?

Measure rack distance, bend space, temperature, and movement. Confirm port compatibility and transmission category. Review bend radius, jacket type, connector finish, and strain relief. Also check grounding and ingress protection requirements. Small details matter.

How can I judge whether a cable meets quality requirements?

Look for recognized standards and clear compliance documents. Review impedance, flame rating, shielding design, and environmental test information. Ask for traceable test data and batch details. Vague claims are not enough.

Is the cheapest armored patch cable the best choice?

Not always. Include installation time, replacement risk, downtime, warranty, and service life. A low-cost cable can become expensive after repeated connector failures. A higher price also proves nothing. Compare evidence, not appearance.

How can I improve long-term reliability?

Test a sample under vibration and repeated patching. Watch its performance after installation. Field conditions often differ from drawings. I once chose excessive protection and made every bend difficult. That was poor judgment. A more flexible cable may work better in a crowded rack.

Conclusion

Choosing the right Armored Patch Cable starts with understanding how its inner conductors, shielding, outer jacket, and protective armor work together. The cable should match your network’s required speed, bandwidth, transmission distance, and environmental conditions. Consider whether the installation will face vibration, pressure, moisture, abrasion, electromagnetic interference, or frequent movement, then select an armor type and protection level that provide suitable durability without creating unnecessary cost or installation challenges.

Connector compatibility is equally important. Check connector types, equipment interfaces, bend radius, available space, and routing conditions before purchasing. A reliable cable should also meet appropriate safety, performance, and manufacturing standards, with consistent construction and dependable materials. Instead of choosing solely by the lowest price, compare expected service life, maintenance needs, signal stability, and total ownership cost. A well-selected Armored Patch Cable can improve network resilience, simplify installation, and deliver dependable performance over the long term.

Sophia

Sophia

Sophia is a dedicated marketing professional with an exceptional depth of knowledge about her company's products and services. With a keen understanding of market trends and customer needs, she crafts insightful blog posts that not only inform but also engage readers, enriching the company’s online......